Them Arms!

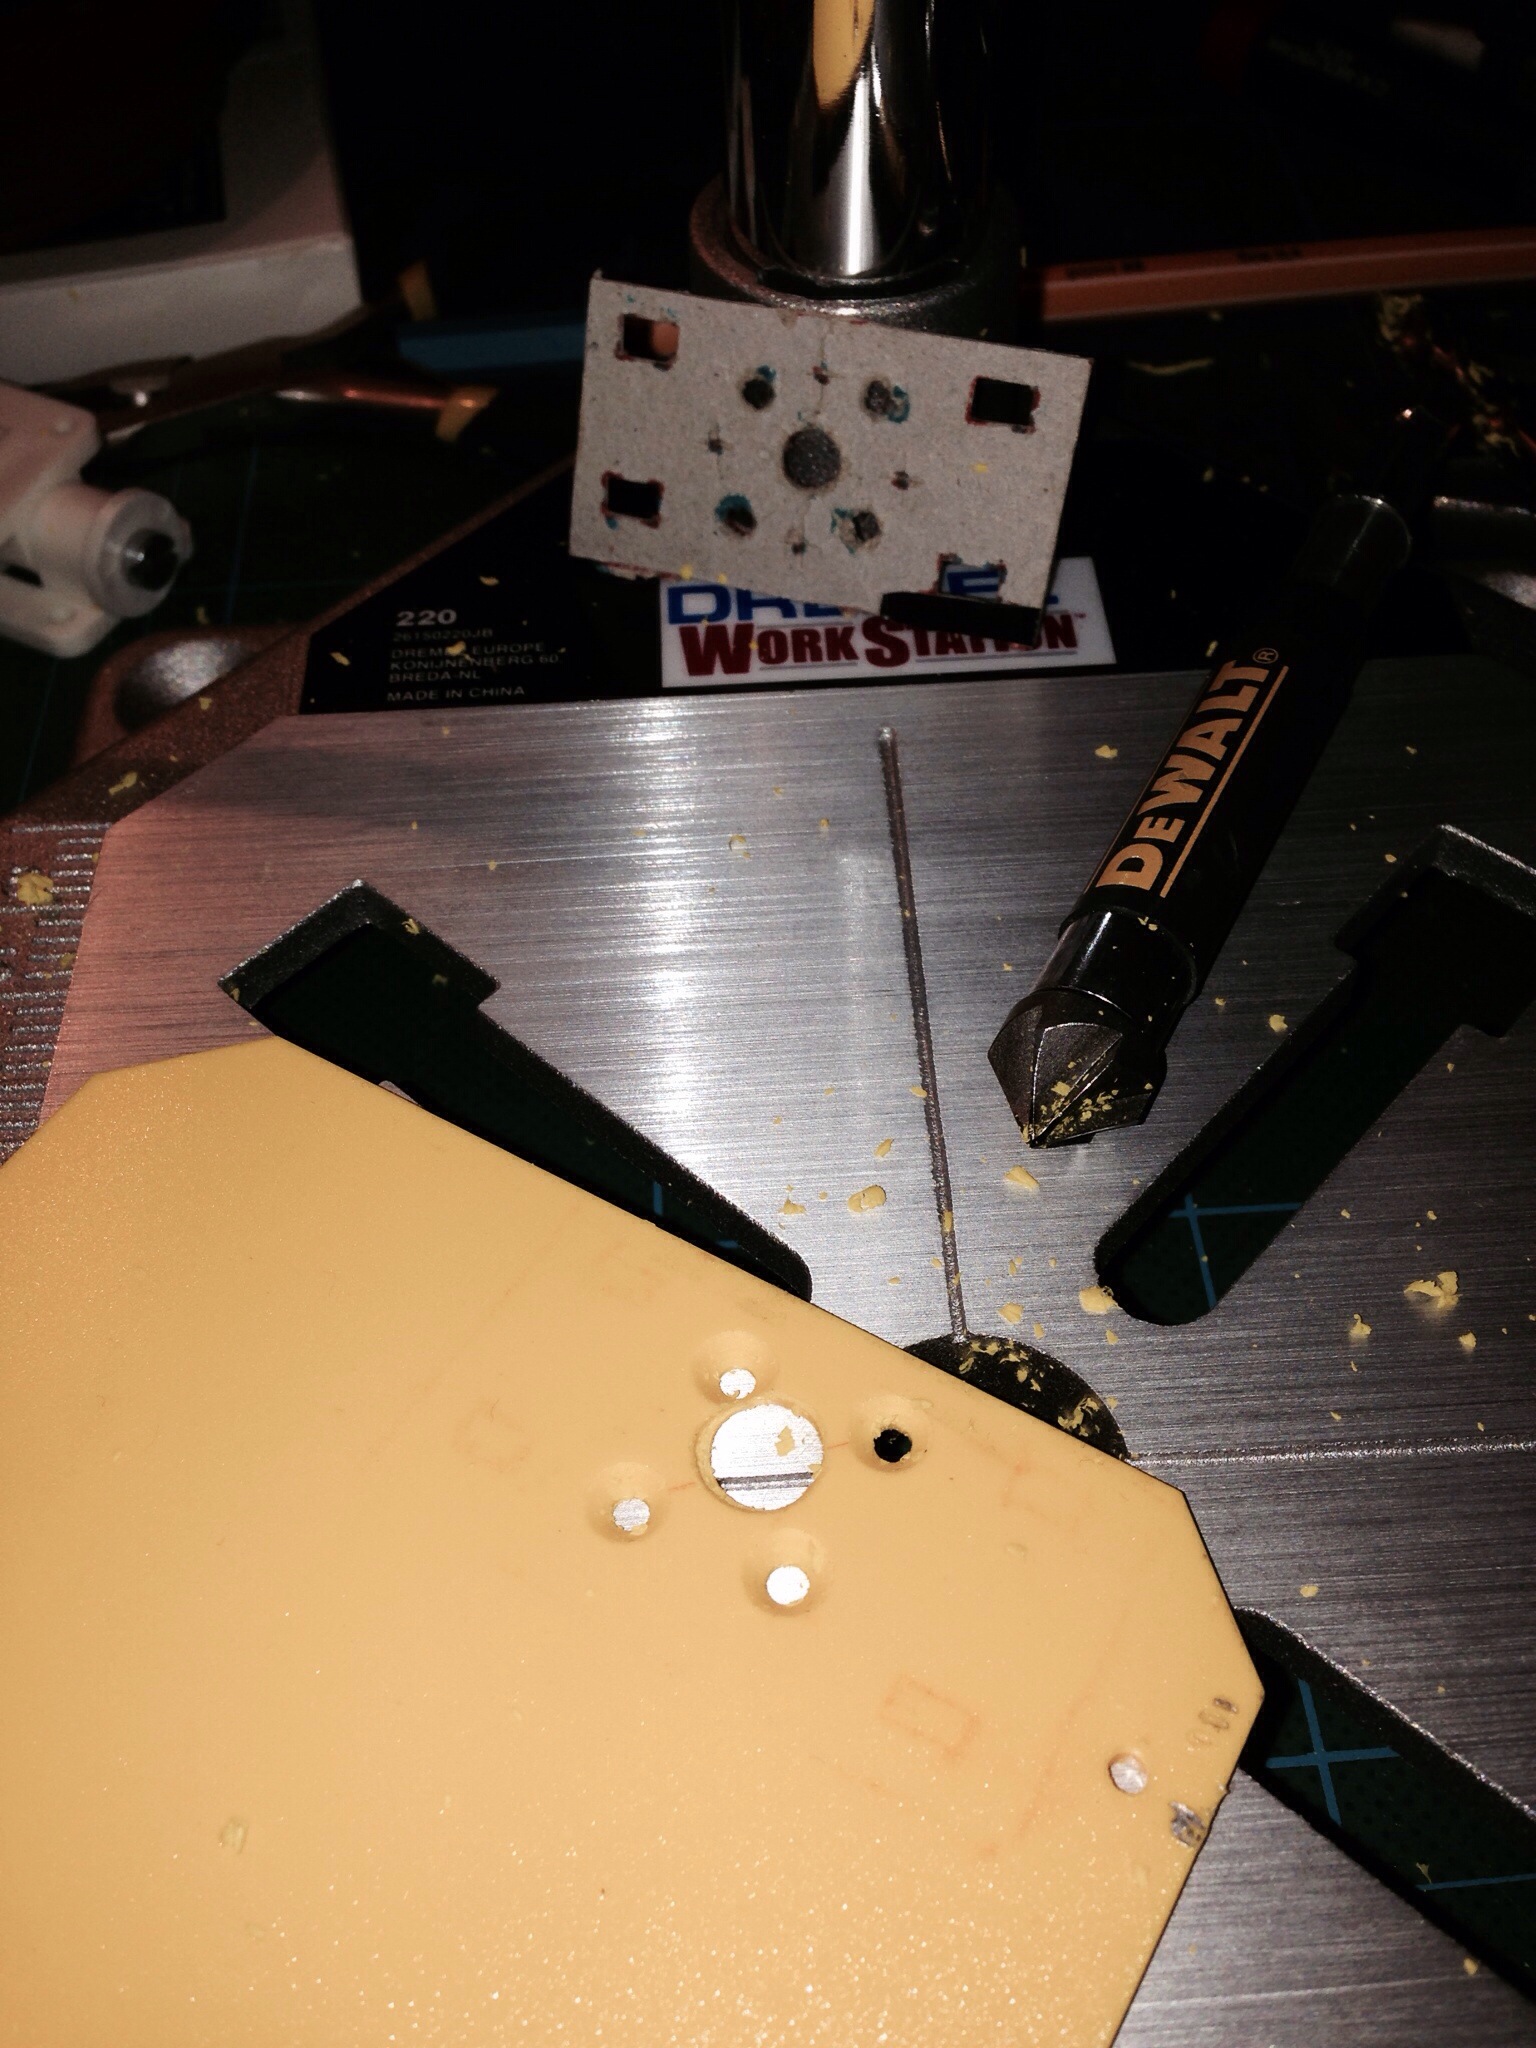
So I finally got to sawing the sticks into arms. With my dremel the once forseen problem with using 14x14mm sticks instead of 12.8×12.8mm soon vanished. As you can see in the images below I carved it down on one side and it is a perfect fit, somewhere around 13x14mm. I also drilled the holes using the Dremel with workstation. I managed to put the two in the back arm in pretty much perfect center and aligned with the bat bone (not done yet in the picture). It seemed impossible at first, especially since I had moved my support bits that held the wood in place. Managed to align and with careful testing and tiny corrections I got it. I’m not even sure if I can replicate that ever again. So I hope they never break… 20131125-182123.jpg
So here is the first picture of how large it will become once built. Even though there’s still much to do this milestone felt so good. πŸ™‚

20131125-182140.jpg

Yey! It can has propellers! Lolz!
20131125-182152.jpgMy cat felt I needed her in the picture for size comparison. She is quite a sturdy cat though πŸ˜‰

Motormounts continued…

I found some new material for the motormounts! A piece of silver-anodized aluminum. It was abit expensive at $11 or 75kr, considering I will be using only ~15cm of the total meter length. But hey, at least now I’ll have spare material incase I need to make repairs.

20131119-090900.jpg
So I have begun working on the final product. I have some drilling to do, it should be easy enough.

20131119-091859.jpg

Prototype done!

So here is the final prototype for my motormount.
20131116-183742.jpg
20131116-183915.jpg
20131116-183934.jpg
I might have used the wrong bit for the Dremel. I used a carving bit for engraving but should have tried the cutting bit first. Now I had to do layer by layer like 20passes for each cut. Maybe I don’t need to do that if the cutting bit works with this plastic… I’ll try that next time.

Drilling in plastic…

So i felt the need to own a Dremel. Bought one. Started to create a first prototype in plastic. I’m pretty sure I need another material for the real thing though. I googled polystyrene and it’s melting point is 240-260 ‘c. I used my multimeter with the temp-sensor to measure the temp of the tip of my soldering iron. Got about 70-110. Tried to apply some of that heat for a couple of seconds. It melted. And it also melted some during drilling. Making a mess out of my drill. So maybe it’s not polystyrene plastic or my reasoning is flaud. I will look for another material with better heat resistance. How about some kind of metal perhaps?

20131115-234514.jpg

Motormount prototyping!

So I have an idea on how to build some motormounts for the AX2810Q (16x19mm cross) to attach with zipties to my wooden booms. I also found other examples on people executing that idea. But using materials and methods of manufacturing that I don’t have access to. I will however try out this thing anyway. By prototyping my way forward from what I began with and created this evening, in cardboard. Needless to say, I will use a somewhat more rigid material in the finished product ;-). Here’s a pic on what this process looks like right now.

20131114-233606.jpg
Bearings upgrade
I also bought the kind of pliers needed to disassemble the motors today… hmm…).

20131114-234923.jpg
Unfortunately I was only successful in replacing the two bearings of one motor. The others where totally stuck and so wouldn’t budge. I gave up. Thinking a broken motor is worse than a bad- or “prone to break and get bad”-motor. I also found something weird stuck in the casing around the magnets… Possibly something that should be left there, maybe for balancing? Some brown/black solidified paste or sediment. I didn’t feel like scraping that off. What if I break the balance? I also found out that there’s abit of oxidation, as you can see in pictures below.

20131114-235040.jpg
But I’m not sure that’s a problem either. Perhaps it’ll burn off or something when I run the motors hot (which I shouldn’t do)…

Motor-tilt-hinge
I almost forgot that I think I managed to assemble a working hinge for the tilt mechanism yesterday night. Not as pretty as David’s carbon fiber axeled but I had a screw that fitted nicely. Locally available parts precede fancy materials if they are good enough. πŸ™‚ Here it is!

20131115-000537.jpg

LEDs and brains!

Finally the Braaainz (KK2.0) arrived along with a LED-stripe and the CW (or standard rotational/right) set of Turnigy 11×4.7 props. The ones I already have are the 11×4.7R or CCW ones.

The KK is so tiny and cute. I only hope it works well, because the LCD-panel was abit loose. I pushed it back and it stayed there so I’m thinking the adhesive probably lost grip due to change in temperatures during shipment. Maybe I get some time to boot it up this weekend and we’ll see.

20131112-202326.jpg

Arms
Yesterday I tried to get a feel of what length of arms I wanted. Initially I was thinking in terms of: “I want it big and slow so I can shoot stable videos!” Somewhere along the lines of what RCExplorer.se David WindestΓ₯l did in the Tricopter 2.5 build video for Flitetest.com. – Around 35cm or longer yet. But after some more research I have seen that the Bat Bone was built with no more than 25cm booms I’m not that afraid of keeping them relatively short. Now it looks like I will be cutting my 1m sticks on 33cm. That means that I have a full set of them with every 1m stick I buy.

Not much missing now but time and energy πŸ™‚ … Well except some screews, motor mounts and landing gears…

Hxt adapter ready!

I finished the adaptercable! Soldering the HXT was a real pain. It was really deep and required alot of tin to fill up. That in combo with my novice skills in soldering the fat AWG 10 and a few bad mistakes made it a hassle. Hopefully it is good enough to deliver both power and durability so that I never need to do this again. Although I might have learned enough to make a solid one next time. Covered upp most of the mistakes with shrink tube. I think it looks ok πŸ™‚
Update: I made a ffwd-buildvideo

20131111-094557.jpg

I have also bought some wooden booms. Unfortunately it’s not as common with 13x13mm in Sweden as I had hoped. I will try with some 15x15mm sticks I found and see if I can make them fit without too much hassle. The alternatives beeing getting them custom made if possible at the shop or ordering online from somewhere else. But I also don’t want to wait for an order to come through every time I break an arm… Still considering the alternatives though.

Crappy HXT connectors!

So I started to work on the adapter for connecting acc to the powerdistribution breakout. Since the acc (a turnigy nano-tech) has HXT connector and the breakout has 6mm bullets I bought 10pcs of HXT connectors and 10pairs of 6mm bc:s. I soldered the bc:s on a pair of 10awg wires. And then I hopped on YouTube to learn how to remove the casing of the HXT so not to melt it when soldering. Well the ones I bought are not supposed to be disassembled at all. But I think I have to in order not to succeed with the soldering. And the easiest way to disjoint the casing is by using a spare (already disjointed) one and I don’t have any of them. So now I have to get creative or destructive somehow…

This is what I should have bought:
http://www.hobbyking.com/mobile/viewproduct.asp?idproduct=9283

But I bought these:
http://www.hobbyking.com/hobbyking/store/uh_viewItem.asp?idProduct=25659

I should have read more about them. And maybe I’m missing something, because they are supposedly easier to use than the others?

20131109-154446.jpg

A whole lot of stuff arrived!

Tricopter-build post #2. Since today everything has arrived except the KK, some booms/arms and working motor mounts… I figured I will start to post a few bits of where I’m at currently in the build. I will try to post often and provide a few pictures along the way. So first post will be about an upcoming sub-project: “power distribution” – I thought I would start with this now since I have all the pieces… But I haven’t got the length of the arms (since I haven’t bought the wooden arms yet) and distances thereof are vague to say the least… I will not be able to finish the hxt-to-6mm-bullet-adapter until I have some idea on how the wiring should be. I’m also not sure about if I need to extend any leads out to the motors along the arms. It’s at least easiest if I just build the frame first. I can however prepare the motors with new bearings and 4mm-bullet-connectors. So that will be the first project I will post about. Later on. Here is a layout of the parts though!

20131106-201713.jpg

And as a bonus picture check out the size of the propellers! They’re HUUUUUUUUGE πŸ˜‰ !

20131106-203513.jpg