
So here is the final prototype for my motormount.


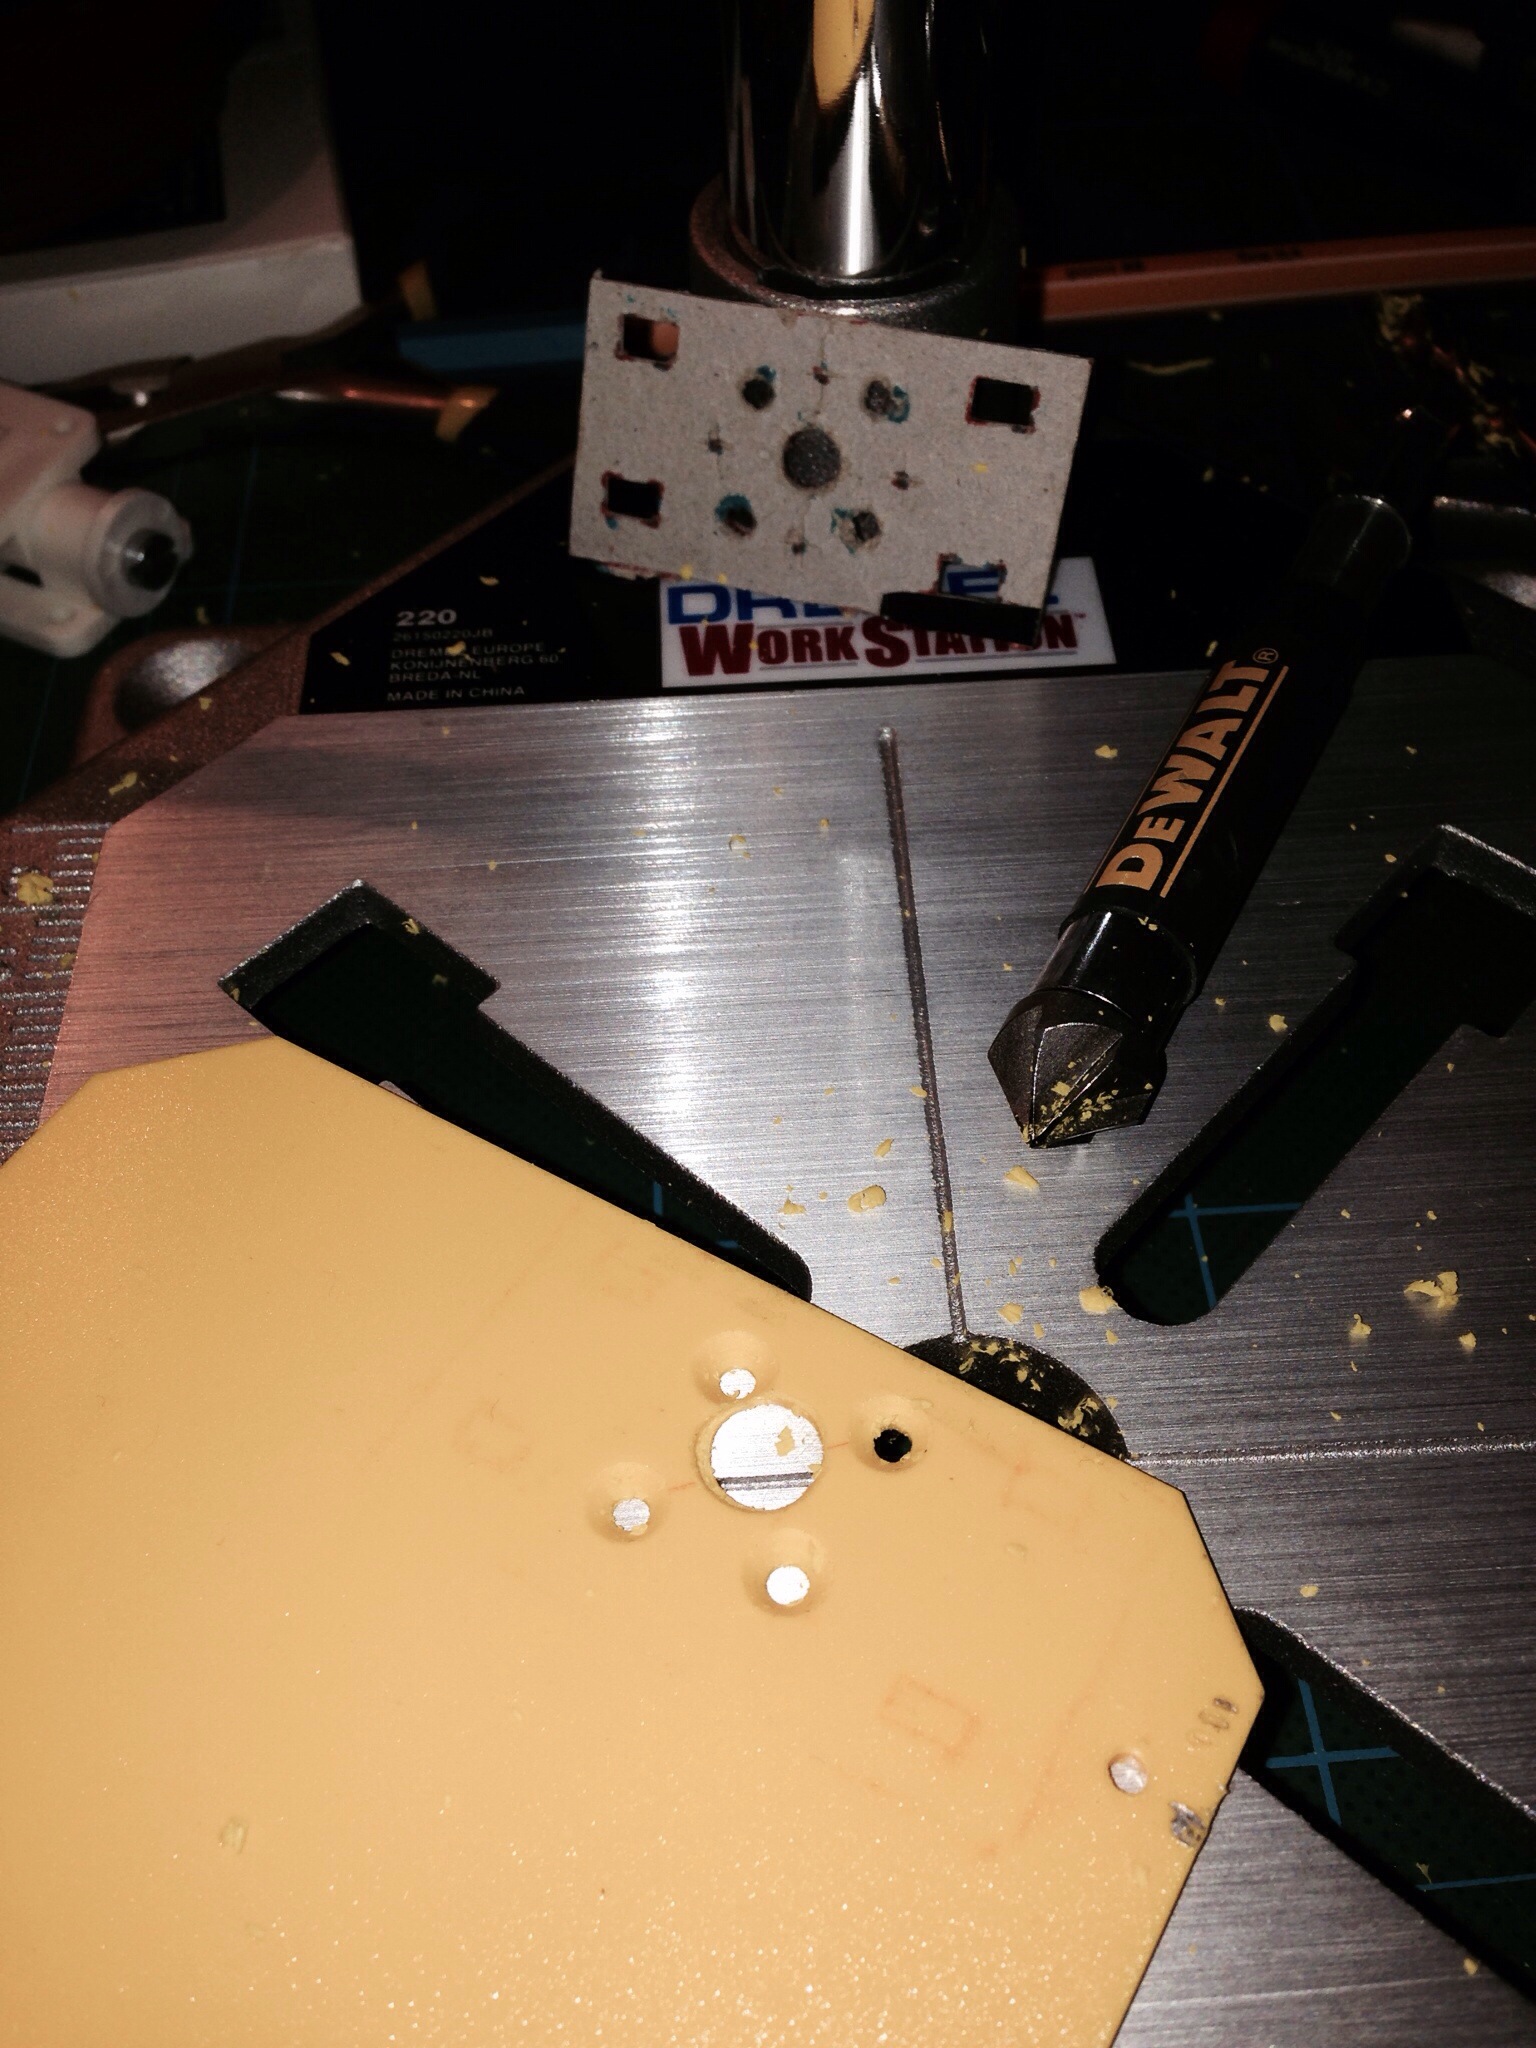
I might have used the wrong bit for the Dremel. I used a carving bit for engraving but should have tried the cutting bit first. Now I had to do layer by layer like 20passes for each cut. Maybe I don’t need to do that if the cutting bit works with this plastic… I’ll try that next time.
Drilling in plastic…
So i felt the need to own a Dremel. Bought one. Started to create a first prototype in plastic. I’m pretty sure I need another material for the real thing though. I googled polystyrene and it’s melting point is 240-260 ‘c. I used my multimeter with the temp-sensor to measure the temp of the tip of my soldering iron. Got about 70-110. Tried to apply some of that heat for a couple of seconds. It melted. And it also melted some during drilling. Making a mess out of my drill. So maybe it’s not polystyrene plastic or my reasoning is flaud. I will look for another material with better heat resistance. How about some kind of metal perhaps?

Motormount prototyping!
So I have an idea on how to build some motormounts for the AX2810Q (16x19mm cross) to attach with zipties to my wooden booms. I also found other examples on people executing that idea. But using materials and methods of manufacturing that I don’t have access to. I will however try out this thing anyway. By prototyping my way forward from what I began with and created this evening, in cardboard. Needless to say, I will use a somewhat more rigid material in the finished product ;-). Here’s a pic on what this process looks like right now.

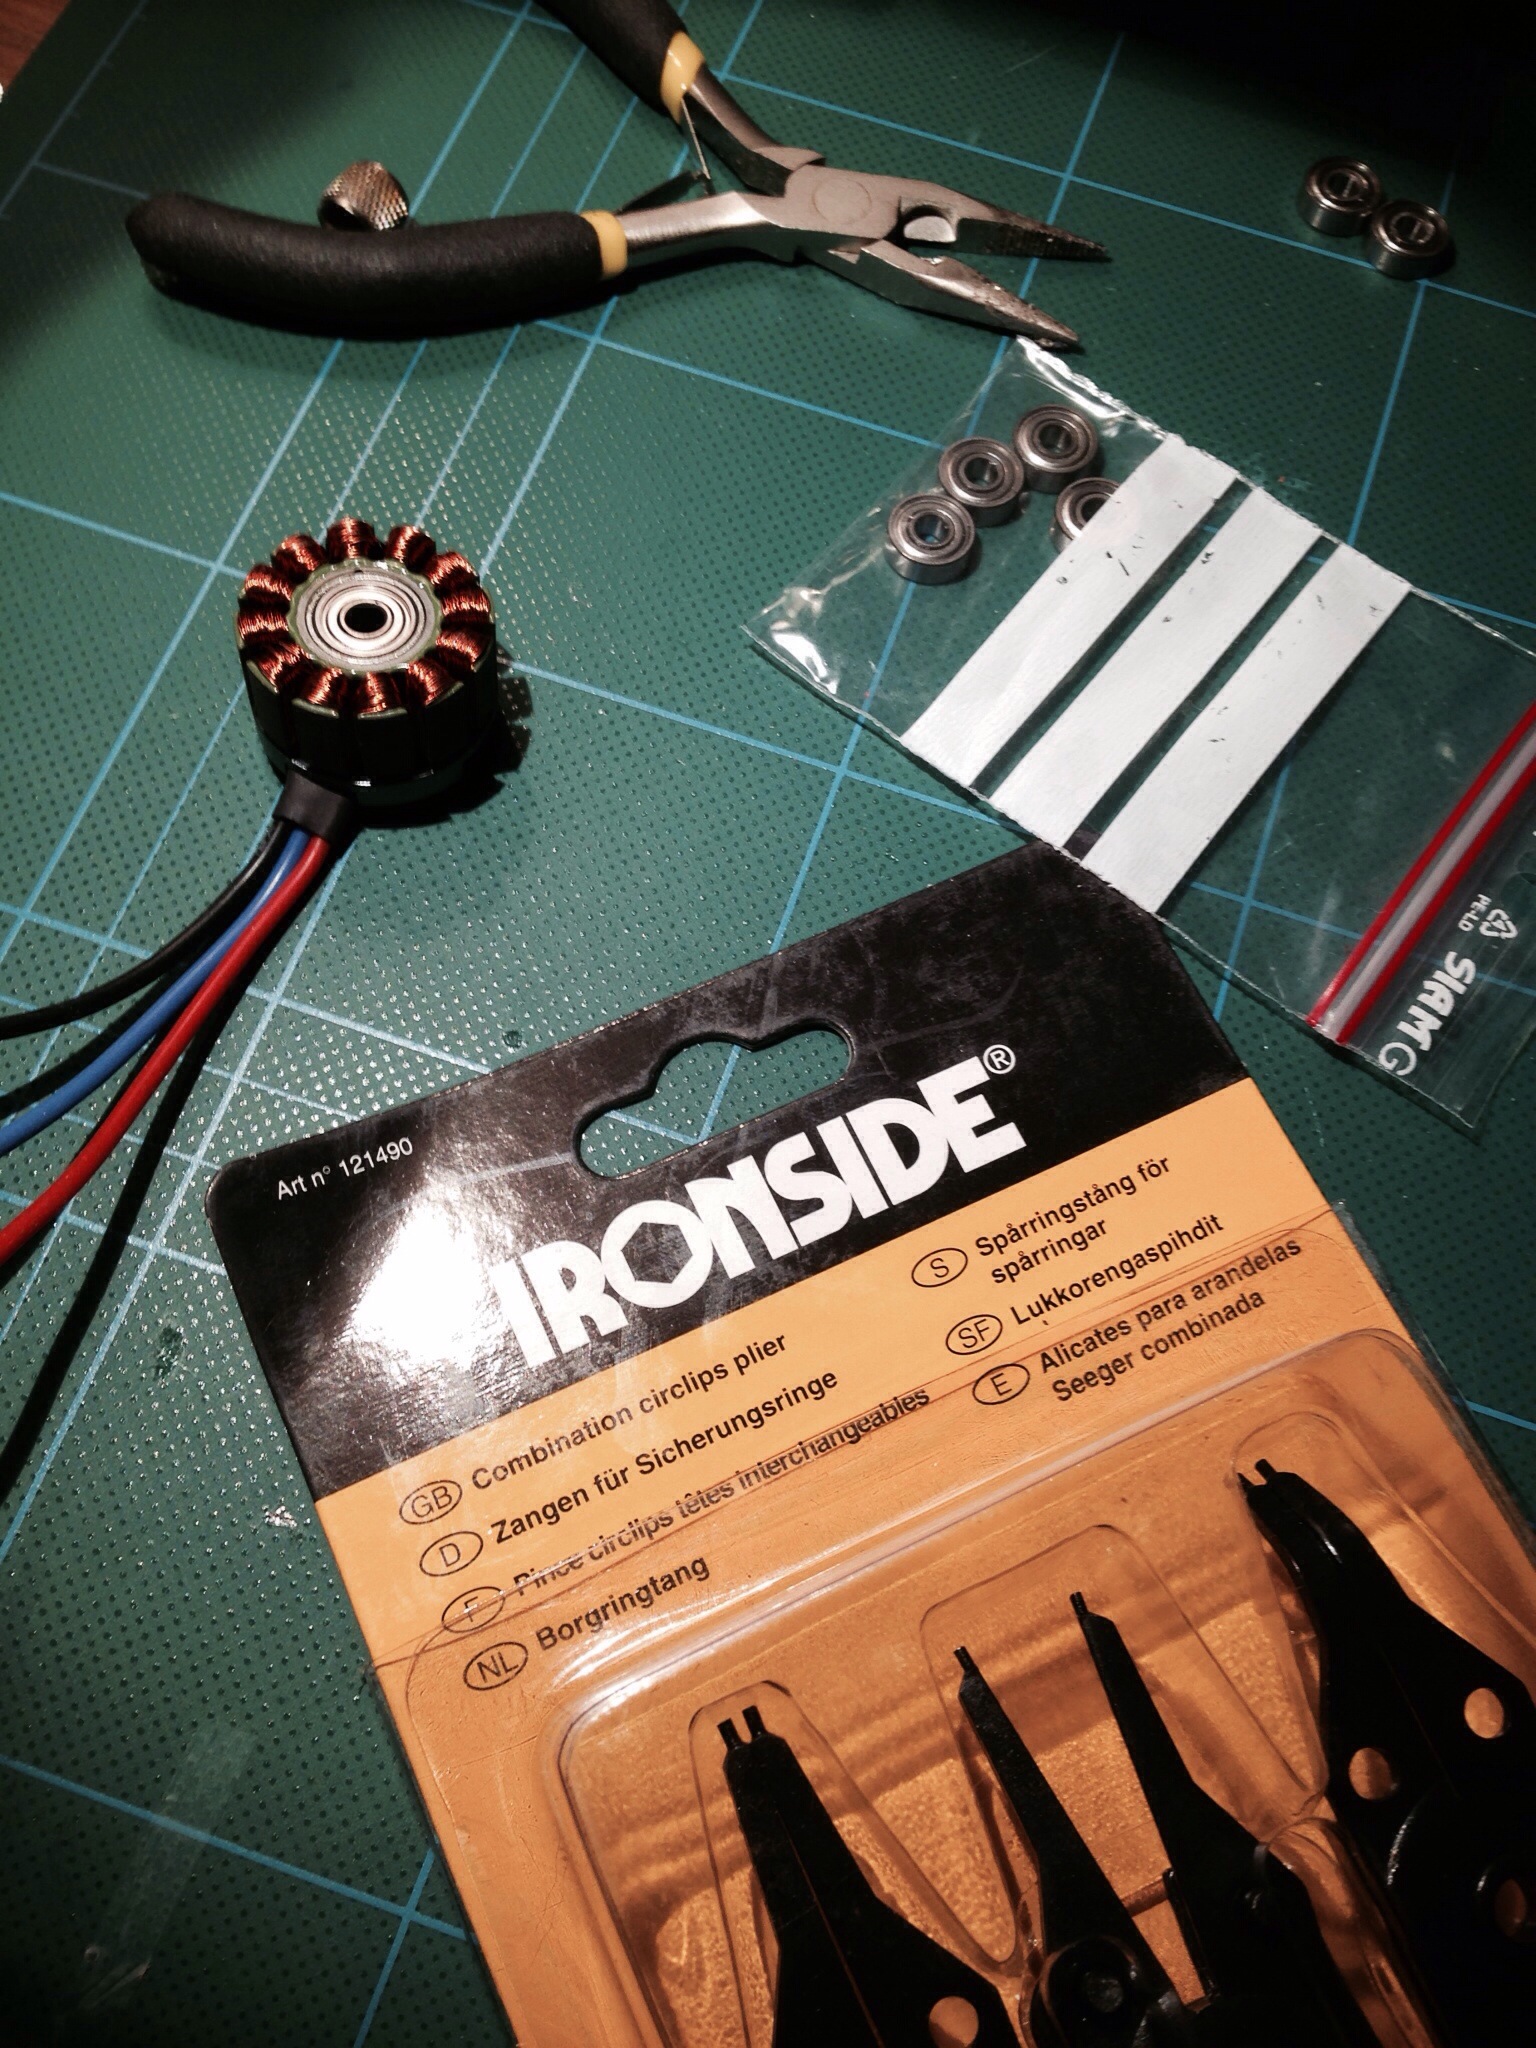
Bearings upgrade
I also bought the kind of pliers needed to disassemble the motors today… hmm…).

Unfortunately I was only successful in replacing the two bearings of one motor. The others where totally stuck and so wouldn’t budge. I gave up. Thinking a broken motor is worse than a bad- or “prone to break and get bad”-motor. I also found something weird stuck in the casing around the magnets… Possibly something that should be left there, maybe for balancing? Some brown/black solidified paste or sediment. I didn’t feel like scraping that off. What if I break the balance? I also found out that there’s abit of oxidation, as you can see in pictures below.

But I’m not sure that’s a problem either. Perhaps it’ll burn off or something when I run the motors hot (which I shouldn’t do)…
Motor-tilt-hinge
I almost forgot that I think I managed to assemble a working hinge for the tilt mechanism yesterday night. Not as pretty as David’s carbon fiber axeled but I had a screw that fitted nicely. Locally available parts precede fancy materials if they are good enough. 🙂 Here it is!

LEDs and brains!
Finally the Braaainz (KK2.0) arrived along with a LED-stripe and the CW (or standard rotational/right) set of Turnigy 11×4.7 props. The ones I already have are the 11×4.7R or CCW ones.
The KK is so tiny and cute. I only hope it works well, because the LCD-panel was abit loose. I pushed it back and it stayed there so I’m thinking the adhesive probably lost grip due to change in temperatures during shipment. Maybe I get some time to boot it up this weekend and we’ll see.

Arms
Yesterday I tried to get a feel of what length of arms I wanted. Initially I was thinking in terms of: “I want it big and slow so I can shoot stable videos!” Somewhere along the lines of what RCExplorer.se David Windestål did in the Tricopter 2.5 build video for Flitetest.com. – Around 35cm or longer yet. But after some more research I have seen that the Bat Bone was built with no more than 25cm booms I’m not that afraid of keeping them relatively short. Now it looks like I will be cutting my 1m sticks on 33cm. That means that I have a full set of them with every 1m stick I buy.
Not much missing now but time and energy 🙂 … Well except some screews, motor mounts and landing gears…
Hxt adapter ready!
I finished the adaptercable! Soldering the HXT was a real pain. It was really deep and required alot of tin to fill up. That in combo with my novice skills in soldering the fat AWG 10 and a few bad mistakes made it a hassle. Hopefully it is good enough to deliver both power and durability so that I never need to do this again. Although I might have learned enough to make a solid one next time. Covered upp most of the mistakes with shrink tube. I think it looks ok 🙂
Update: I made a ffwd-buildvideo

I have also bought some wooden booms. Unfortunately it’s not as common with 13x13mm in Sweden as I had hoped. I will try with some 15x15mm sticks I found and see if I can make them fit without too much hassle. The alternatives beeing getting them custom made if possible at the shop or ordering online from somewhere else. But I also don’t want to wait for an order to come through every time I break an arm… Still considering the alternatives though.
Crappy HXT connectors!
So I started to work on the adapter for connecting acc to the powerdistribution breakout. Since the acc (a turnigy nano-tech) has HXT connector and the breakout has 6mm bullets I bought 10pcs of HXT connectors and 10pairs of 6mm bc:s. I soldered the bc:s on a pair of 10awg wires. And then I hopped on YouTube to learn how to remove the casing of the HXT so not to melt it when soldering. Well the ones I bought are not supposed to be disassembled at all. But I think I have to in order not to succeed with the soldering. And the easiest way to disjoint the casing is by using a spare (already disjointed) one and I don’t have any of them. So now I have to get creative or destructive somehow…
This is what I should have bought:
http://www.hobbyking.com/mobile/viewproduct.asp?idproduct=9283
But I bought these:
http://www.hobbyking.com/hobbyking/store/uh_viewItem.asp?idProduct=25659
I should have read more about them. And maybe I’m missing something, because they are supposedly easier to use than the others?

A whole lot of stuff arrived!
Tricopter-build post #2. Since today everything has arrived except the KK, some booms/arms and working motor mounts… I figured I will start to post a few bits of where I’m at currently in the build. I will try to post often and provide a few pictures along the way. So first post will be about an upcoming sub-project: “power distribution” – I thought I would start with this now since I have all the pieces… But I haven’t got the length of the arms (since I haven’t bought the wooden arms yet) and distances thereof are vague to say the least… I will not be able to finish the hxt-to-6mm-bullet-adapter until I have some idea on how the wiring should be. I’m also not sure about if I need to extend any leads out to the motors along the arms. It’s at least easiest if I just build the frame first. I can however prepare the motors with new bearings and 4mm-bullet-connectors. So that will be the first project I will post about. Later on. Here is a layout of the parts though!

And as a bonus picture check out the size of the propellers! They’re HUUUUUUUUGE 😉 !

Tricopter Bat Bone AX-2810Q
 The shopping list
I figured I would present the list of items I have bought first, and then let you read my thoughts on why i chose what to perhaps answer a few questions about that.
So without further ado here it is: http://goo.gl/F7D1sQ
Why Tricopter and Batbone
I’m a noob in the hobby of RC flying. I began to fly V911 helicopters a couple of month ago and pretty soon after I bought a small Nine-eagle Xtra-300 airplane then V929/949 miniquad and also a Blade Nano CPx. I then got enough interested to start putting even some more money into it and am now going to build a multicopter. I was (and am currently) heavily influenced by David Windestål and his Tricopters, made known to me by the guys at Flitetest.com. I decided that I wanted the “swoosh” and “the glide” more than the “robotic movements” of a X-quad (badly flown?). I also wanted a challanging project to be proud of (if I get it flying) and something different than what my friends had built. I set my mind on using Davids and Flitetests foldable tricopter base. But later turned over to their Batbone base instead. The plans to use wooden booms bought locally. And custom landing gears using plastic or wood as “stilt” or “legs”. And zip-ties as much as possible for mounting stuff including motors. They all made me come to the conclusion that some component must be of really good looking design to counterbalance this otherwise “budget looking” vessel. And hey, the only reason that’s really needed: It’s a bat.
Booms
I will buy and cut my own booms since I want them longer than 25cm for more stability. I’m not sure how long yet, but I’m thinking somewhere between 35cm and 45cm (having the tailboom abit longer ofcourse). The 25cm booms can be bought from Flitetest shop but if you want another size or come to the conclusion as I did that I probably will break them a few times and want to have replacements within easy reach.
Flitetest Tricopter Tilt-mechanizm using the BMS-385 digital servo.
I found the servo-parts on a local hobby-fair and bough them for about 70kr so now I need to use them. The alternative would have been to construct something similar myself or to buy the 13-370 tilt mount from Flitetest i guess, but I don’t want those possibly fragile and “harder to get” landinggears and motormounts. The servo is on backorder on HK worldwide =(. But can be ordered locally in sweden from rcflight.com (they had 18 pcs in stock) for about ca 280kr + posting. So I paid a hard 331kr for mine =( ouch… There are alternatives but I didn’t find any post about an as good as this one at the same price. Although that was comparing the HK price of $20 though. But I had already locked in on this when I found out about the stock issues.
AX-2810Q motors and propellers
I will start with SF 11×4.7 propellers. Beause someone on some random forumthread made it sound like a sensible size for this motor. SF=Slow fly. 11×4.7 (inch) or 279x119mm, could also be named 1147 and R1147 (for RH/CCW). Tricopters can allegedly fly with all 3 standard rotating propellers but at a small tilted angle (unleveled). If the left and back propellers turn standard and the rightmost propeller turn RH the copter should stay leveled instead. Which is preferred if you use it for shooting videos.
Green 11×4.7 SF propellers
Standard rotation in stock at HK “EU warehouse” and right hand (RH/CCW) rotation on HK “International warehouse”. I really do hope both orders come through without issues.
And yeah, I’ll buy a few blacks too as soon as I have tested that these work.
Tip: To find the propellers, search for 11×4.7 on HK.
FC1147 propellers
I also found some interesting ones at Goodluckbuy i might buy later on: http://goo.gl/jpY8Gm.
Some excerpts from my research about propellers and these motors
“Perfect on a Tri. Heaps of power with 4S and 10×4.7, or better still 11×4.7. “
“I have bought several pieces of this motor. I have found some quality issues. 4 of 10 motors was missing the main shaft screw and two motors came with loose bottom bearing. The motor itself is high quality. Just look for missing screws or loose bearing.”
“If you are planning to use over 1.3kg multi rotor and 10″ props, use 4s battery, or change for 12″ propeller. With a 1.6kg quad/3s/10×4.5 props it hovers in 60-65pcnt. In a hex a/2kg/10×4.5/3s it hovers with a little bit over 55pcnt, but its power hungry (10min with 5000mhA 3s) and is a little bit sluggish. So, in my opinion, 4s is mandatory with 10″ propeller and multirotor over 1.3kg, or just try to use 12” props. All tests I did motors came down pretty cool. Highly recommended.”
Bad bearings on AX-2810Q
“Just ordered genuine EZO bearings as the original bearings are poor. For less than £3 per motor its a worthwhile upgrade”
Q: “What are the sizes of the bearings for these engines, anyboby knows ?”
A: “11mm x 4mm x 4mm – Size code is 694zz. EZO bearings are the best and less than £1.50 each”
– http://www.rcgroups.com/forums/showthread.php?t=1733937&page=3
So i ordered bearings from a local webshop that delivers high quality ones. Not cheap. At least that’s a good sign that could translate into quality. I hade to “bite the bullet”: 6 * 45kr + 49kr administrative charge (whatever that’s for?). Shipping was free though! Or was it?
I considered buying them at Ebay, but how can I then be sure about quality? I want my engines at their best. Maybe next time I will go for sunnysky or another quality brand of quad motors. After all. I did opt-out of buying DT750 for the reason not wanting to rework the motors. I do not want to exchange bearings more than once. And most bearings on Ebay either look like poor-quality or show too few guarantees.
More research on the motor
Here’s some info that might come in handy when I do a proper eCalc multicopter calculation at http://ecalc.ch/xcoptercalc.htm:
“…. engine resistance, its, as stated somewhere else in this thread, 0.108 Ohm. Power limit is more like 370 W at 14,8V not 400W…”
Motor mounts and landing gear
The AX-2810Q has 16/19mm M3 screws for motor mounts. I really would like a motormount based on zip-ties holding the motors. But theese motors aren’t as easy to mount using zip-ties as the DT750:s with their “foot”. These motors are meant to be fastened using screws from beneath. I will have to get creative and create some adapter or similar. For now I bought some sort of brackets that I hope to be able to utilize for this task. I’m not really sure how for now. For landing gears I will cut some plastic squares or such. Plain and simple. If and when I do Go-Pro I will need to upgrade them, but for now I will use my 808#16 that don’t need so much clearence.
Power
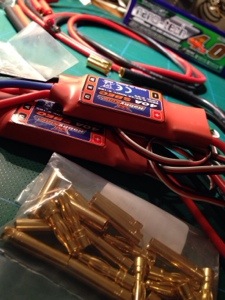
Specs say the motor will maxout at 35A so I will go 40A on the ESC:s. Sizing the powersystem for 40A gives plenty of headroom and also gives me the possibility to upgrade motors later on if I want to. I’m going to use a Turnigy nano-tech 4S 25-50C 4000mah Lipo. My basic calculations are that at maximum 35A, multiplied with 3 motors gives 105Amps of power needed. At 25C the Lipo can give 4.0 * 25 = 100A. So with this battery I should be OK unless I actually manage to draw 35A or more per engine constantly. But I figure that if that happens something else is wrong. About the connectors. I found the breakout-cable I wanted to use, a 5.5mm bullet-connector pair to 4x4mm bullet-connectors. There was no version for tricopters but that’s an easy fix. However I then learned that the nano-tech Turnigys use HXT connectors. And there was no such adapter. I will consequently build my own HXT to 5.5mm 10AWG adapter cable. It feels like the right thing todo, following the HXT standards and with also having good possibilities of changing connectors later on without changing my breakout wiring. I also bought extension bullet-connected wires for the possibly extra lengthy arms while also minimizing the need to solder extended wires.
Too be continued…